Entering Historical Attendance Records

Entering historical attendance records enables you to add a student's attendance data back into the system if it had been deleted. If a parent informs the school that their child's attendance is incorrect for a past year, you can use the Attendance Entry by Student option in the Attendance module to correct the error. This option enables you to add historical attendance for a student without requiring you to schedule the student into classes for those prior years. However, the student must have an Entry record for each of the historical years where you want to add historical attendance.

You may also need to enter historical attendance records if a student receives an award based on perfect attendance, achieves valedictorian status, or has met truancy attendance requirements.

Modifying attendance for previous years may cause issues through an audit if data submitted to the state for the modified year is different than the data currently showing in the system.

Note: If you are not already familiar with attendance entry, you can reference the general instructions for using the Attendance Entry by Student option.

Before you begin

  • The student for whom you want to add historical attendance must have an entry record in each historical year where you want to add attendance.

  • Calendar, attendance periods, and attendance types must be set up for each historical year where you want to add attendance.

  1. Select Menu > Administrative Access > Attendance.
  2. Select Attendance Entry by Student under Features.
    Step Information

    Alternatively, you can enter historical records by navigating to Menu > Administrative Access > Student and then selecting Student Profile under Features. You must select the student you would like to enter a historical attendance record for by entering the student's name in the Student search field near the top left of the screen. Then, you must select the Attendance tab group at the left of the screen and select the All Years sub-tab. You can then click Add Attendance near the top right of the screen. Skip to step 7.

    Expected Result

    You see the Attendance Entry by Student screen.

  3. Change the school year to the correct historical year by checking the information at the top left of the screen.
    Step Information

    You must be working in a historical year to add historical attendance records.

  4. Click Add Student Attendance near the top right of the screen.
    Expected Result

    You see the Entry by Student screen.

  5. Begin entering the student's name in the Student search field near the top left of the screen.
    Step Information

    Students with similar names appear in a drop-down list. If necessary, continue entering more of the student's name until it appears in the list.

  6. Select the student from the drop-down list.
  7. Under the Quick Entry heading, enter the Start Date or click the Calendar 31 icon to choose a date using the calendar.
    Step Information

    This defaults to the current date but since you are entering a historical record, this will need to be changed to the appropriate start date.

  8. Enter the End Date or click the Calendar 31 icon to choose a date using the calendar.
    Step Information

    This defaults to the current date but since you are entering a historical record, this will need to be changed to the appropriate end date.

  9. Check the box for All Day if appropriate.
    Step Information

    If you check this box, the Start Period and End Period are disabled. Skip to step 12.

    If you did not check this box, continue to the next step.

  10. Enter the Start Period or click the Down Arrow icon to choose from the drop-down list.
    Step Information
    This identifies the Attendance Period when the historical attendance record should begin.
  11. Enter the End Period or click the Down Arrow icon to choose from the drop-down list.
    Step Information

    You can only select periods that are equal to or greater than the selected start period. For example, if you select period 4 for the Start Period, only periods 4 through 8 are available for selection for the End Period.

    This identifies the attendance period when the historical attendance record should end.

  12. Enter the Type or click the Down Arrow icon to choose from the drop-down list, if appropriate.
  13. Enter the Reason or click the Down Arrow icon to choose from the drop-down list, if appropriate.
  14. Enter a Comment if appropriate.
    Step Information

    For example, you could enter "Restoring lost data."

    Expected Result

    If you entered a comment, the View icon displays to the right of the Comment field. Continue to the next step.

    If you did not enter a comment, skip to step 18.

  15. Click the View icon to the right of the Comment field if you wish to adjust the privacy settings.
    Expected Result

    You see the Mass Attendance Comment Privacy Settings pop-up window.

  16. Check the box for each portal you wish to Hide Comments In.
    Step Information

    You can use the Select checkbox if you wish to check or uncheck all options.

  17. Click Done near the bottom right of the window.
    Expected Result

    You return to the Entry by Student screen.

  18. Check the box for Guardian Notified if appropriate.
    Step Information

    Skyward recommends that this option is not used when modifying attendance in historical years, as verifying the guardian was aware of the absence is unlikely.

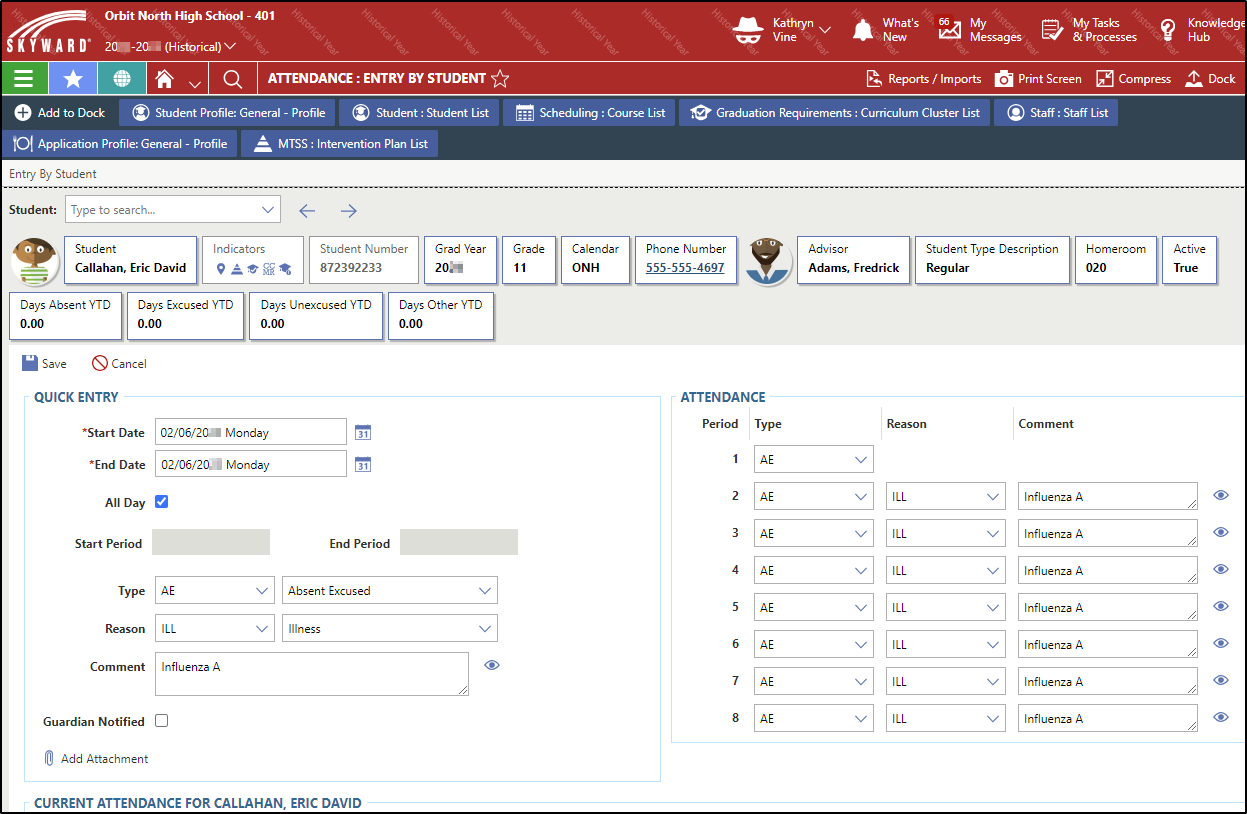
    The following image displays the Entry by Student screen of a historical excused absence for an Influenza A illness for Eric David Callahan.


  19. Choose one of the options near the top left of the screen to save your work.
    OptionDescription
    Save & Back

    Saves the attendance record and you return to the Attendance Entry by Student screen.

    Save Saves the attendance record and you remain on the Entry by Student screen.