Configuring Action Slip Printing Options

The tardy kiosk prints action slips and issues them to students who have an excessive number of tardies. Action slips notify a student when they have received a discipline infraction and need to serve the action associated with it. For example, when a student who meets the specified threshold for tardies checks in through the Tardy Kiosk, an action slip can be printed to indicate the student must serve an action, such as a detention, due to excessive tardies. Before you can print action slips, you must complete configuration options for your Entity in the Entity Group Year Configuration of the Discipline module. Configuring action slips identifies the information to be included on the printed slip. You set up a tardy kiosk to process and print the actions slips. You can choose whether to print the action slips on receipt or letter-sized paper.

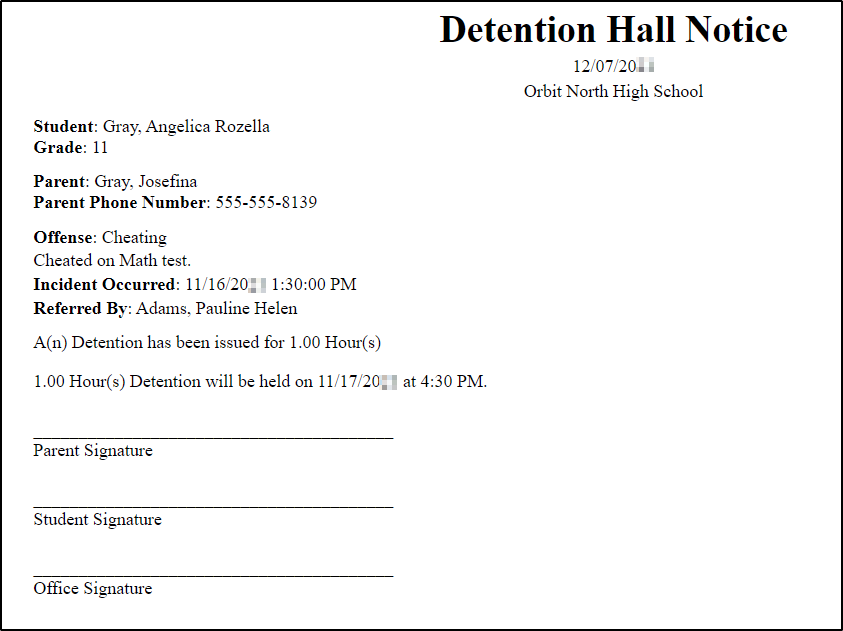
The image below displays an example of a printed action slip.

Before you begin

  1. Select Menu > Administrative Access > Discipline.
  2. Select Entity Group Year Configuration under Settings.
    Expected Result

    You see the General tab of the Entity Group Year Configuration Details screen.

  3. Select the Discipline Slip tab at the left of the screen.
    Expected Result

    You see options that enable you to configure discipline slip details.

  4. Verify the Discipline Slip Title or enter the correct title if necessary.
    Step Information

    This defaults to Detention Hall Notice, but can be modified. For example, you could enter Tardy Detention Slip.

  5. Verify the appropriate Include on Slip boxes are checked or unchecked as necessary.
    Step Information

    You can use the Select checkbox if you wish to check or uncheck all options.

    The options you can select include details about the student, offense, incident, and disciplinary action.

  6. Verify the appropriate Include Signature Line boxes are checked or unchecked as necessary.
    Step Information

    You can use the Select checkbox if you wish to check or uncheck all options.

    You can include signature lines for parents, students, and office staff.

  7. Choose one of the options near the top left of the screen to save your work.
    OptionDescription
    Save & BackSaves the configuration details you created and you return to the General tab of the Entity Group Year Configuration Details screen.
    Save ChangesSaves the configuration details you created and you remain on the Discipline Slip tab of the Entity Group Year Configuration Details screen.