Entering Attendance via Tardy Kiosk

After you have configured the tardy kiosk, students can enter their Student Number into the kiosk to generate their attendance record and print their tardy slips. You determine the information that prints on students' tardy slips when you set up the kiosk. For example, if a student is running late, they may need a tardy slip to be admitted to class. The student can enter their student number using a keypad attached to the kiosk and select the Print option to print their tardy slip for admittance into class.

Tardy slips can only be entered after the period has started. Students can only receive one tardy per period through the tardy kiosk. If the student logs in during a period they already have a tardy in, they are able to reprint the slips.

Before you begin

  • The tardy kiosk must be configured.

  1. Select Menu > Administrative Access > Attendance.
  2. Select Tardy Kiosk under Features.
    Expected Result

    You see the Tardy Kiosk, which displays the current date and time at the top of the screen.

  3. Enter the Student Number for the student you wish to create a tardy attendance record for.
    Step Information

    Students typically enter this number themselves at a kiosk location. Tardy records generate immediately, so if the wrong ID number is entered, but it is a valid ID for another student, the tardy record will be attached to the wrong student. If it is an invalid ID number, the kiosk will indicate so.

  4. Select Go > at the bottom of the screen, or press Enter on your keyboard to continue.
    Step Information
    Expected Result

    You see the student's name appear under the current date and time. Under the student's name, you see their grade, the date and time of the tardy entry record, the student's current Tardy Count, and the current Period for which the student is tardy. The Tardy Count listed includes the tardy that has just been added.

  5. Select Print > near the bottom of the screen to print the tardy slip.
    Expected Result

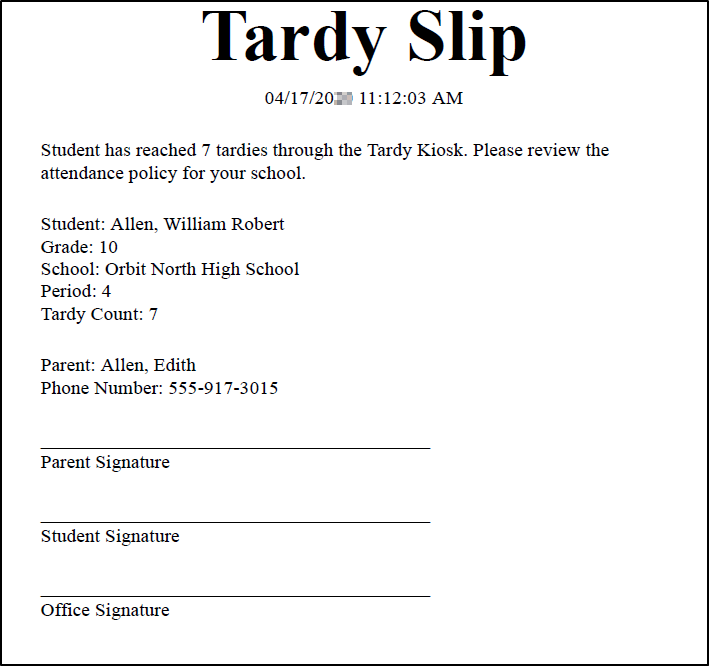
    The screen refreshes to display the period and time the tardy attendance record was entered. You see a new window open to preview the slip. The information you see on the slip is determined in the Entity Group Year Configuration.

    The image below is an example of a tardy slip printed from a tardy kiosk.


  6. Follow your district's procedures for printing documents to print the slip.

Result(s)

You have successfully entered the student's tardy attendance record using the tardy kiosk and printed their tardy slip.