Entering Class Report Card Comments
Scroll past the video to access the step-by-step instructions.
Before you begin
-
Comments must be turned on for your entity by administrators in the Entity Group Configuration of the Gradebook module.
-
Comment sets must exist for your district.
-
The maximum number of characters for free form comments must be configured.
Audio Transcript
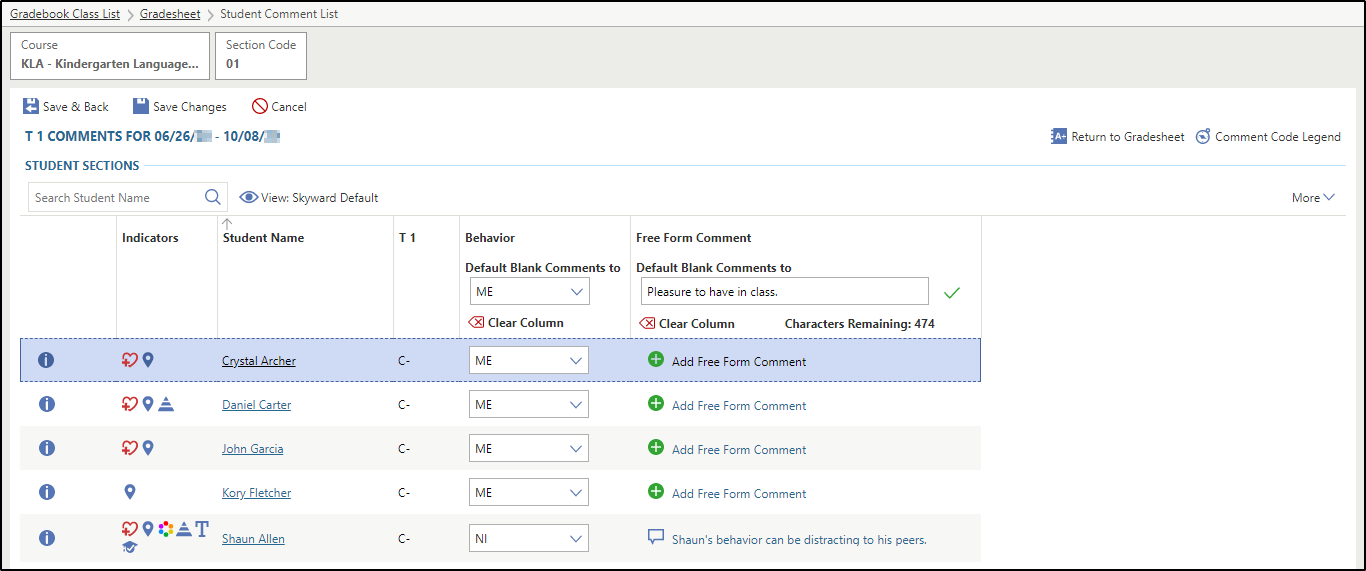
Entering class report card comments allows you to configure exactly how those comments appear on your students’ report cards by using either a comment set previously created or recording free-form comments. Within Teacher Access, let’s begin the process by heading over to the Gradesheet within the Gradebook module. If we’re automatically taken to a specific class, we could use the Class List option to choose the class we want to view the gradesheet for. Let’s select the grading period we want to enter comments for, and then select Add / Edit Comments for Grading Period. In the appropriate comment column, we could choose the code we want all blank comments to default to for that specific section. We can then see that the comment will automatically be added for each student that currently has a blank comment. If we wanted to enter our own comment, we could do that within the Free Form Comment column. As we enter our comment, we’ll notice the Characters Remaining updates. Selecting the green checkmark will apply this comment to all the students who have a blank comment. Once finished, we can save our changes to complete the process. Now that you know how to enter class report card comments, you can be sure that they display on your students’ report cards just how you want them to.
Entering class report card comments allows you to configure exactly how those comments appear on your students’ report cards by using either a comment set previously created or recording free-form comments. Within Teacher Access, let’s begin the process by heading over to the Gradesheet within the Gradebook module. If we’re automatically taken to a specific class, we could use the Class List option to choose the class we want to view the gradesheet for. Let’s select the grading period we want to enter comments for, and then select Add / Edit Comments for Grading Period. In the appropriate comment column, we could choose the code we want all blank comments to default to for that specific section. We can then see that the comment will automatically be added for each student that currently has a blank comment. If we wanted to enter our own comment, we could do that within the Free Form Comment column. As we enter our comment, we’ll notice the Characters Remaining updates. Selecting the green checkmark will apply this comment to all the students who have a blank comment. Once finished, we can save our changes to complete the process. Now that you know how to enter class report card comments, you can be sure that they display on your students’ report cards just how you want them to.
-
In the Free Form Comment column,
enter a comment in the "Default Blank Comments to" field and click the checkmark
to the right of the field.
You can use this option to mass assign a free form comment for all students and then manually update that comment for specific students, if necessary. The number of characters available displays under the field and updates as you type.
For example, you could enter a comment listing the tasks that all of the students completed this term. The image below shows an example of report card comments entered for one class.