Attaching Seating Chart to Room Layout
Seating charts provide a quick way to see which students are present and absent when taking attendance. The seating chart is an optional feature that enables you to see a bird's-eye view of your classroom. Your seating chart shows where each desk is located and which student is assigned to each desk, which is helpful when you are learning student names at the beginning of the year. Seating charts are user-specific, so teachers who team teach will both have to create their own. For example, if Mr. Jones and Mrs. Smith teach kindergarten together in the same room, each teacher would need to create a seating chart for the room layout in order to take attendance by seating chart. You can also clone seating charts if necessary.
Before you begin
-
A room layout must exist.
Audio Transcript
As a teacher, keeping track of which student is in what class and where they sit can make attendance quite the hassle. Luckily, there’s a simple solution! The seating chart feature lets us create and customize multiple seating arrangements for a classroom and the many classes that are taught, which makes attendance quick, easy, and hassle-free. The seating chart tool can be found in the Attendance module. From here, we will highlight the room layout that we’d like to add a seating chart for and select Add Seating Chart. The Description will define our seating chart. Since we are assigning students by class, we’ll name this appropriately. We’ll leave the Seating Chart Grouping as By Class. We’ll notice the rest of the information defaults in based on the class we are attached to. We could update these fields if needed. Let’s save and assign seats now. Since it’s the beginning of the year and we don’t know how students will interact, we will auto assign seats. We can always update the seats as needed in the future. We’d like to assign students to seats at random, so we’ll select that radio button. Let’s Save. Now that your seating chart is configured, you can easily take attendance by seating chart.
As a teacher, keeping track of which student is in what class and where they sit can make attendance quite the hassle. Luckily, there’s a simple solution! The seating chart feature lets us create and customize multiple seating arrangements for a classroom and the many classes that are taught, which makes attendance quick, easy, and hassle-free. The seating chart tool can be found in the Attendance module. From here, we will highlight the room layout that we’d like to add a seating chart for and select Add Seating Chart. The Description will define our seating chart. Since we are assigning students by class, we’ll name this appropriately. We’ll leave the Seating Chart Grouping as By Class. We’ll notice the rest of the information defaults in based on the class we are attached to. We could update these fields if needed. Let’s save and assign seats now. Since it’s the beginning of the year and we don’t know how students will interact, we will auto assign seats. We can always update the seats as needed in the future. We’d like to assign students to seats at random, so we’ll select that radio button. Let’s Save. Now that your seating chart is configured, you can easily take attendance by seating chart.
-
Click Save near the bottom right of the window.
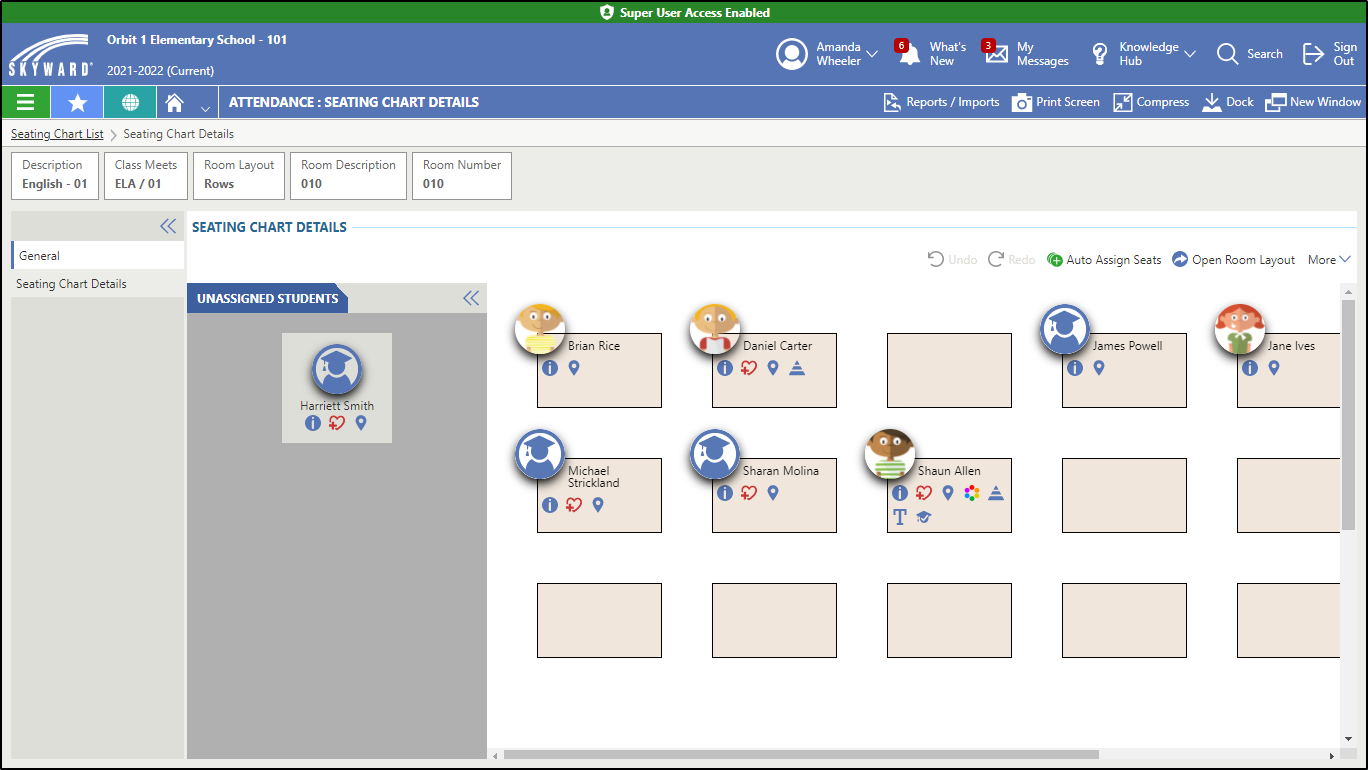
You return to the General tab of the Seating Chart Details screen, which displays the student names on their corresponding desks, as well as their profile pictures and indicators, if available. If you wish to remove a student from a desk, click and drag their icon to a new desk or back to the Unassigned Students tab at the left of the screen.
Students with a future enrollment date display on the seating chart with a Start date.
The size of the desks depends on the student with the largest number of indicators. For example, if a student with three rows of indicators is added to the seating chart and all of the other students in the class only have one row of indicators, the other desks resize to match the size of the desk of the student with the most indicators.
Result(s)
You have successfully attached a seating chart to a room layout.