Processing Student Enrollment Status Change
Scroll past the video to access the step-by-step instructions.
You may see fields in the following media that do not apply to your state. Please reference the written documentation for guidance on fields applicable to your state.
Before you begin
-
Withdrawal codes must be set up.
Audio Transcript
Processing a student enrollment status change enables you to track when a student experiences changes that affect their enrollment in your entity. For example, if a student begins attending special education courses, their student type will need to be changed to specify that they're a special education student. The enrollment status change process enables you to maintain your student's other information, such as lockers assigned to them, their schedule, and any special programs they're a part of. A new enrollment record will also automatically be created for the following date and will end the previous enrollment record that was created. To begin, let's navigate to the Student Profile feature within the Student module. After verifying that we're in the correct student profile, we'll select the Student Enrollment sub-tab under the Enrollment tab group. We'll see all of this student's existing entry withdrawals here. Let's click the drop-down icon next to the entry withdrawal we want to create a status change for. Within the Record Options drop-down menu, we'll select Status Change. All the information under the Entry heading defaults in based on the entry withdrawal we selected and cannot be modified. The state reporting fields default based on state requirements and cannot be changed. Under the Withdrawal heading, we'll verify the End Date. This defaults to the current date, but can be modified if needed. The Withdrawal Date populates with the day immediately following the date you entered in the End Date field or with the next academic day and cannot be modified. The Withdrawal Code explains how the enrollment record has ended. For this example, we'll select the code of SC – Status Change since the status of our student is changing. We can enter a comment into the Withdrawal Comment field if needed. This student will still be moving into the next grade for the upcoming year as they normally would, so we can leave the Promotion Status field as P – Promote. The Report To CRDC field defaults as checked and cannot be changed. Let's click Next. Here, we see all the fees attached to this student. If we don't want certain fees to be affected by the status change, we can check the boxes next to each fee. Since we want all these fees to remain as is, we'll check the box under the Select heading to check all fees. Let's click Enroll. The Start Date field defaults based on the end date of the withdrawal record and cannot be modified. The Effective Start Date is used to indicate the actual day the student will begin classes if the Start Date is not a school day. For our example the start date is the first day of school so we can leave this as is. This student will be enrolled in the entity 100% of the time, so we'll leave it as is. The Grad Year/Grade field is the year the student will graduate and the current grade the student is in. This field defaults based on the information entered on the student's profile but can be modified if needed. If we had a pre-K or kindergarten student, the Grade Level Subcategory would give us the flexibility to say our grade level is pre-K or kindergarten and the subcategory is AM or PM. For our example we do not need a Grade Level Subcategory since our student is in fourth grade, and does not need a grade level subcategory, so we can leave this field as is. The Entry Code field is used to indicate how or why the enrollment is being created. This defaults based on information entered on the student's profile but can be modified if necessary. We can enter an entry comment into the corresponding field if needed. This student will be enrolled into the 101 entity and will follow the Orbit 1 Elementary School calendar, so the following fields can be left as is. Since this student will begin attending special education courses, we'll update the Student Type to be SE. The Default Entity box can be left as checked since this will be the student's default entity. We can leave the state reporting fields as is for this example and click Save. We'll notice that a new entry withdrawal is created with the student's new Student Type code. With this process now complete, you can ensure that you can accurately track any status changes that affect your students' enrollment within your entity.
Processing a student enrollment status change enables you to track when a student experiences changes that affect their enrollment in your entity. For example, if a student begins attending special education courses, their student type will need to be changed to specify that they're a special education student. The enrollment status change process enables you to maintain your student's other information, such as lockers assigned to them, their schedule, and any special programs they're a part of. A new enrollment record will also automatically be created for the following date and will end the previous enrollment record that was created. To begin, let's navigate to the Student Profile feature within the Student module. After verifying that we're in the correct student profile, we'll select the Student Enrollment sub-tab under the Enrollment tab group. We'll see all of this student's existing entry withdrawals here. Let's click the drop-down icon next to the entry withdrawal we want to create a status change for. Within the Record Options drop-down menu, we'll select Status Change. All the information under the Entry heading defaults in based on the entry withdrawal we selected and cannot be modified. The state reporting fields default based on state requirements and cannot be changed. Under the Withdrawal heading, we'll verify the End Date. This defaults to the current date, but can be modified if needed. The Withdrawal Date populates with the day immediately following the date you entered in the End Date field or with the next academic day and cannot be modified. The Withdrawal Code explains how the enrollment record has ended. For this example, we'll select the code of SC – Status Change since the status of our student is changing. We can enter a comment into the Withdrawal Comment field if needed. This student will still be moving into the next grade for the upcoming year as they normally would, so we can leave the Promotion Status field as P – Promote. The Report To CRDC field defaults as checked and cannot be changed. Let's click Next. Here, we see all the fees attached to this student. If we don't want certain fees to be affected by the status change, we can check the boxes next to each fee. Since we want all these fees to remain as is, we'll check the box under the Select heading to check all fees. Let's click Enroll. The Start Date field defaults based on the end date of the withdrawal record and cannot be modified. The Effective Start Date is used to indicate the actual day the student will begin classes if the Start Date is not a school day. For our example the start date is the first day of school so we can leave this as is. This student will be enrolled in the entity 100% of the time, so we'll leave it as is. The Grad Year/Grade field is the year the student will graduate and the current grade the student is in. This field defaults based on the information entered on the student's profile but can be modified if needed. If we had a pre-K or kindergarten student, the Grade Level Subcategory would give us the flexibility to say our grade level is pre-K or kindergarten and the subcategory is AM or PM. For our example we do not need a Grade Level Subcategory since our student is in fourth grade, and does not need a grade level subcategory, so we can leave this field as is. The Entry Code field is used to indicate how or why the enrollment is being created. This defaults based on information entered on the student's profile but can be modified if necessary. We can enter an entry comment into the corresponding field if needed. This student will be enrolled into the 101 entity and will follow the Orbit 1 Elementary School calendar, so the following fields can be left as is. Since this student will begin attending special education courses, we'll update the Student Type to be SE. The Default Entity box can be left as checked since this will be the student's default entity. We can leave the state reporting fields as is for this example and click Save. We'll notice that a new entry withdrawal is created with the student's new Student Type code. With this process now complete, you can ensure that you can accurately track any status changes that affect your students' enrollment within your entity.
- Select Status Change from the menu.
The Status Change option does not display if the student has a No Show entry withdrawal record.
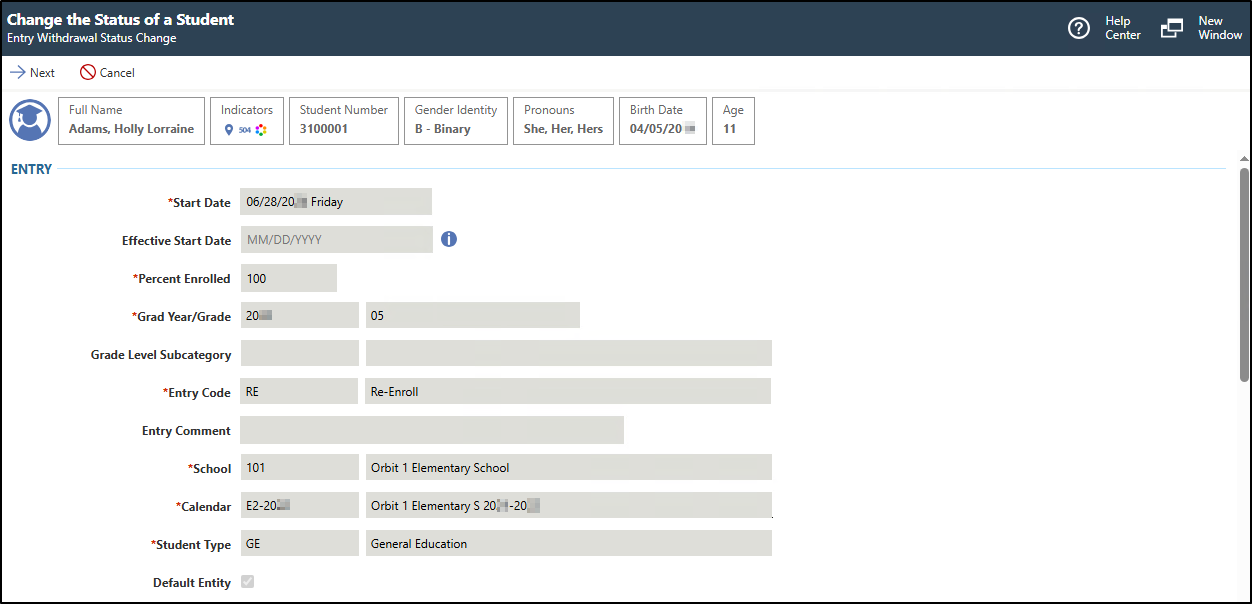
You see the Change the Status of a Student screen, which displays the entry withdrawal record details. These fields default based on the information entered on the student's entry withdrawal record and cannot be modified. If you need to make changes, you must open the record and update the information on the Entry Withdrawal Details screen.
- Complete the appropriate fields.
You must complete required fields before you can save your work. Fields marked as Optional in the documentation are not required to complete.

- Click Next near the top left of the screen.
You see a list of customer fees to be left as is.

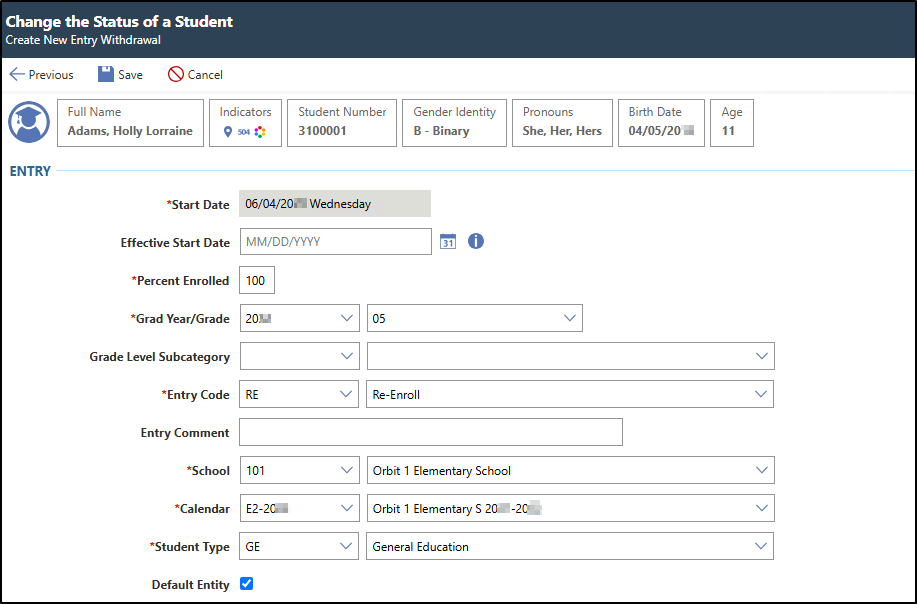
- Click Enroll near the top left of the screen.
You see fields that enable you to complete the entry record. The start date of the entry record defaults to the day after the end date of the withdrawal record. The remaining fields default from the previous entry record.
- Click Next near the top left of the screen.
Result(s)
You have successfully processed a student enrollment status change.